How To Make A Quick Design Video
Despite 40-plus years on this big, blue rock, I've come to the realization that I don't actually know all that much. Except how to make web videos. I've made hundreds of them over the years and currently create product videos as my day job. Here are some of the tips, tricks, and apps I use on a regular basis to make better videos with a reasonable amount of time, budget, and expertise. My advice is best suited to you if you're just getting into video making or perhaps have made a handful of videos already and are looking to get a bit more serious.
1. Sweeten your sound
First, a note on cameras: The one on your phone is almost certainly perfectly fine for just about any shareable video you want to shoot. Don't go buy a new camera unless you've really got a problem with the video your phone captures.
The microphone on your phone, however, is not great. Same goes for the one built into your computer. So investing in a decent mic can make a big difference in your final video, and luckily you don't have to break the bank to get decent sound. Here are a few options based on your budget.
Cheap/free: Use the headphones that came with your phone. They're better than nothing, since the built-in mic is purpose-built to sit near your mouth and pick up your voice. You can plug some phone headsets into your computer as well, if you're using a desktop or laptop. Traditional 3.5-mm headsets should work fine, as should some newer USB-C versions.
Midrange: In the $50 to $130 price range, Blue Yeti USB microphones are excellent options for using your computer to record your voice. The $100 Yeti Nano offers good value for the money and doesn't take up too much desk space.
High-end: Check out a broadcast headset package like this $220 Audio-Technica bundle, which includes a nice, high-quality headset and the requisite cables and mixer you'll need to hook it up to your computer. This is a great option if you find yourself doing a fair amount of voice work and need consistent recording quality.
Do your best to record in a quiet space, and should you need to brush up your recording to remove background noise, check out the free, open-source Audacity software and its helpful noise reduction feature.

2. Save your screens
Nothing bolsters a tutorial, how-to, or presentation like a good, old-fashioned screen grab. And fortunately, there are plenty of options, whether you want to grab static stills or full-motion video.
Cheap/free: For basic screengrabs, Windows has the built-in Snipping Tool (click the Start button and search for "Snipping Tool"), while MacOS has a few keyboard shortcuts you can use depending on the shot you need. And if you use Chrome, the Nimbus Screenshot extension is awesome for grabbing web pages.
For grabbing video, we've also got a couple free, built-in options for each platform. If you're using Windows 10, you have access to the Xbox Game Bar recording feature, which works pretty well for grabbing full-screen video. You can access it by holding the Windows key on your keyboard and pressing the G key. On the Mac side, screen recording can be found inside the QuickTime app or by pressing Shift-Command-5 if you're using Mojave. More info here.
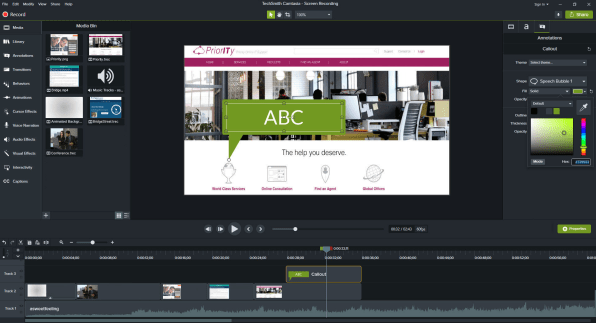
Midrange/high-end: If you find yourself capturing stills and videos a lot, check out TechSmith's $50 Snagit app or the company's $250 Camtasia software (which we'll revisit in the next section).
3. Cut away the clutter
Now, the scary part, which isn't all that scary once you get the basics down: editing. By now you've recorded yourself. Maybe captured some screens. Maybe procured some audio. It's time to cobble it all together, and there's an almost endless number of options for doing so. Here are a few based on budget that work well for basic to intermediately complex videos.
Cheap/free: Windows 10 has a decent built-in video editor that's confusingly hidden in the Photos app. Search for Photos from the Start Menu, and you'll find the editor under the "New video" button in the upper-right corner. For Mac, there's the iMovie app, which is reasonably easy to use. Both of these options are good places to start if you've never edited before. The basic workflow is the same: Corral the video files and images you want to work with, then arrange them in the order you want. Trim the video files to remove unnecessary cruft, maybe add some titles and music, and you're good to go. Again, try these first—they're free and approachable.
Midrange: Once you're ready for something with a bit more oomph, take a look at the $70 Magix Movie Edit Pro on the Windows side of the house or the $60 Adobe Premiere Elements app for both Windows and Mac. Both apps offer respectably full-featured free trials, so give them a try before throwing down any cash and then go with whichever you like using best.
High-end: "High-end" might be a bit strong here, as professional video editing suites can run into the thousands, but the $250 Camtasia suite has just about everything you need for grabbing screens, recording audio, editing video, and everything in between. It's easy to get into, and then once you're hooked, it's well supported by how-to videos and tutorials from the company and elsewhere on the web. And it works on both Windows and Mac. This is my daily driver for making product videos and demos.

4. Embellish and excite
Once you've got the basic structure of your video together, it might be time to add some proverbial seasoning in the form of stock media: music, videos, images, and the like. There's media scattered all across the web, of course, but if your video stands any chance of making you money in any way, you'll want to be on the lookout for media that's available "for commercial use." Don't just grab anything, in other words, unless you're looking to get sued. Here are a few spots to try.
Cheap/free: I love Pixabay for images and video. It's got a reasonably large selection for something that costs nothing. Start here to see if it's got what you need. And for music, the excellent YouTube Audio Library has an incredible selection of free music and sound effects you can use in your videos so long as they find their way to YouTube—which is probably one of the places you'll upload your videos anyway. Tip: Under the Attribution menu, select "Attribution not required" or you'll need to add language to the end of your video crediting the artist and song.
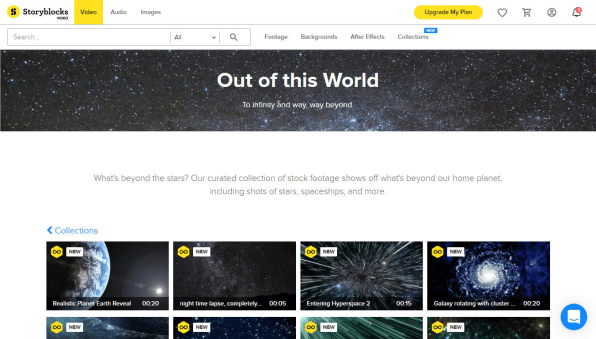
Midrange: For a broader selection of slightly more polished stock video, Storyblocks offers good value at $200 per year for unlimited use. There's also a $350 premium package that offers video, music, and images.
High-end: Once you get really serious, crack open that wallet for sites like Shutterstock, Pond5, iStock, and similar offerings. At these places, you'll generally pay per clip you download, or a fixed price per year that includes a set number of downloads. Often, you'll find higher-quality media here than at the sites that are cheap or free.
5. Get good!
You've taken the first steps toward media merriment—congrats! As you hone your skills, don't forget to brush up on tutorials straight from the experts. Making videos can get complicated quickly, but there are a ton of resources online that you can leverage.
Cheap/free: There's YouTube, of course, which almost certainly has a thousand different videos showing you a thousand different ways to work with audio envelopes or rendering settings. If you're looking for something extremely specific, it's probably a good first stop. But don't forget about the app-makers themselves. Camtasia-maker TechSmith has a profusion of tutorials. Same goes for Adobe when it comes to Premiere Elements. Ditto: Magix for Movie Edit Pro.
Midrange: For really getting into the nuts and bolts of specific software, I'm a big fan of LinkedIn Learning (formerly Lynda.com), which offers hours-long courses for various tools: Camtasia and just about all of the Adobe products, to name a few. Courses range from beginning to intermediate to expert, and the site starts at $20 a month if you pay annually.
How To Make A Quick Design Video
Source: https://www.fastcompany.com/90394505/i-create-videos-for-a-living-these-tools-make-it-easy-and-affordable
Posted by: gerstnercappraid.blogspot.com

0 Response to "How To Make A Quick Design Video"
Post a Comment